Use Azure Resource Explorer to discover hidden settings for Azure provisioning
Tags: Azure
In one of the blog posts I explained how you can provision an Azure Web App (Website) with Application Settings. I was asked a few times where I found this information. At the time of writing, the Azure provisioning using Resource Manager is not very well documented therefore there are lots of parts you need to figure out by yourself.
In this post I will explain a few tricks you can use when doing provisioning using Resource Manager and where you can find more information. So if you want to impress your colleagues with indepth knowledge of Azure Resources keep reading.
Azure introduced a new entity - Resource Explorer. There are a few ways you can get to it.
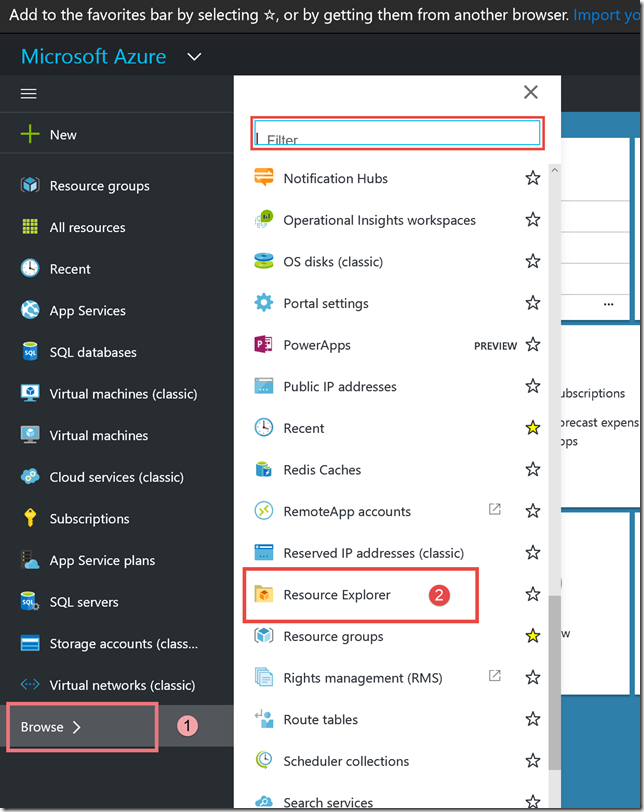
In Azure portal select Browse and either scroll till you find Resource Explorer as in the below image or start typing in the top filter.
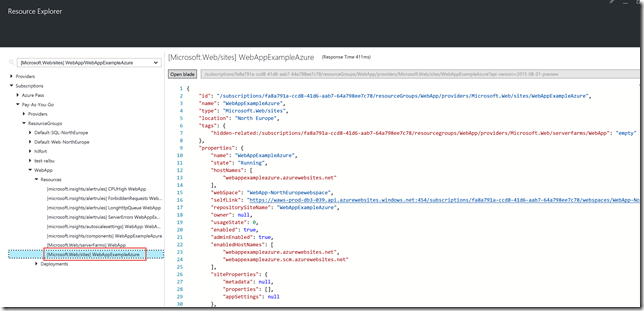
In the Resource Explorer, type your Web Site name or if you're after a different resource then type the name of that resource.
In the list of resources you'll see that Azure created a few of them. This is a nice way of finding out which resources Azure creates for you. That list is part of a resource template which Azure uses to create the Web App (and other resources). You can edit that template but this is a topic for another post.
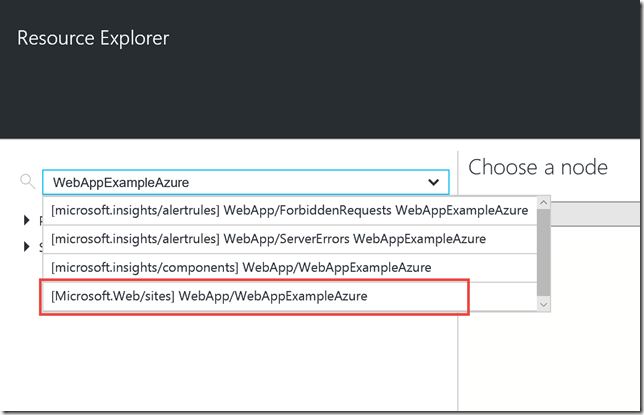
Select the [Microsoft.Web/sites]{WebApp} in the list of resources. In the right hand side you'll se a json structure - it contains all of your Web App properties.
In this way you can quickly check your web app details.
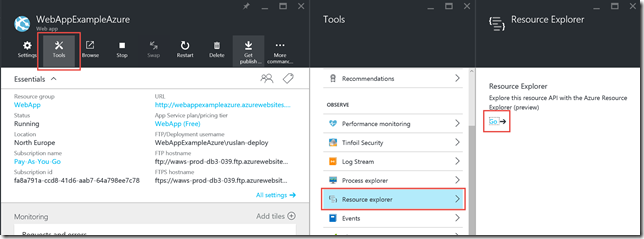
You can get the same information when you open the resources.azure.com web site and search for your web app. If you're struggling to get the correct resource for the web app then another way is to open your web app, click on tools, Resource explorer and click on the Go link. It will open the resources.azure.com but the web app will be selected in this case.
You get the same json structure as before but the advantage of this is you can drill down into settings. For example, click on the + config node and after that connectionstrings. If you have any connection it will appear here.
Now when you're familiar with Resource Explorer and how you can find your resource let's get to our problem - how I can add additional settings when I provision a Web App.
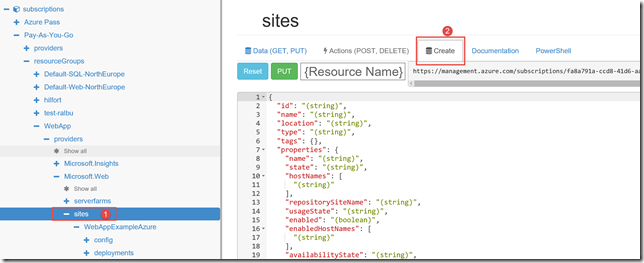
In the Resource Explorer web site click on the sites link which is the parent of your Web App, and after that click on the top Create link, like in the image below.
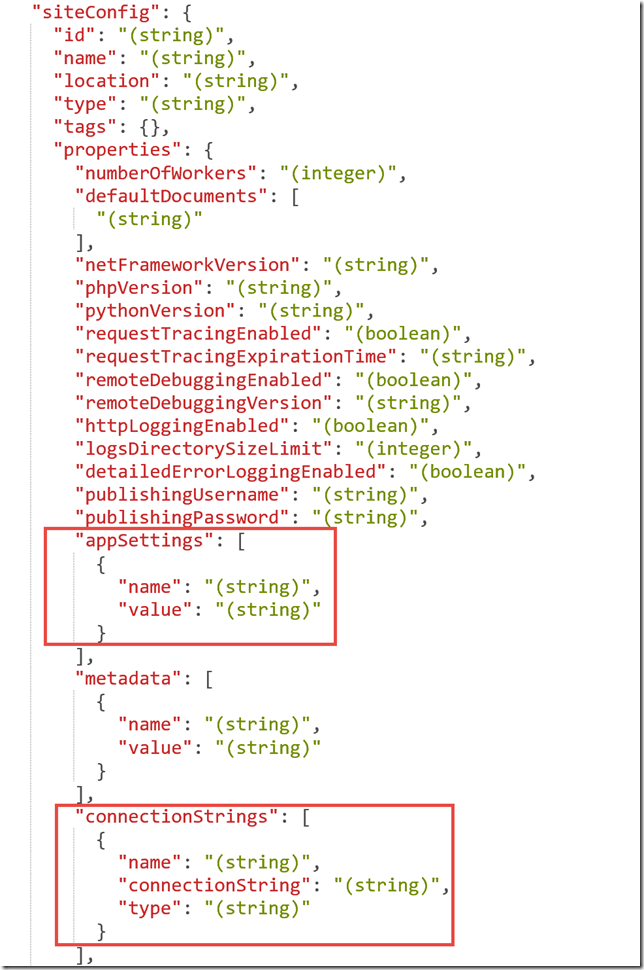
Scroll down till you find the siteConfig setting in the json on the right hand side. You can see that it contains appSettings, connectionStrings, etc. Now you need to follow the instruction I posted before and add your necessary settings.
If you start digging more into Resource Explorer you'll find that you have a very powerful tool in your hand.
