Azure Mobile Service deployment with Team City part 6. Integrate SpecFlow with TeamCity
Tags: .NET, Azure, CI, TeamCity
In the previous blog post I explained how to configure TeamCity to run a PowerShell script which will deploy an Azure Mobile Service.
After the Mobile Service was deployed we want to run acceptance tests. I’ve created a sample C# project using SpecFlow. It doesn’t have to be Acceptance Tests, I just wanted to give an example of how you’ll integrate SpecFlow with TeamCity. The solution contains the “Specifications” project which are a set of SpecFlow scenarios. SpecFlow has the ability to generate reports – we’ll be generating one report and integrate it with TeamCity.
We’ll create a new file – acceptance-tests.ps1 in the Scripts folder.
In order to generate a report we need to run a command which executes the NUnit tests as described in the documentation https://github.com/techtalk/SpecFlow/wiki/Reporting. For this purpose we need NUnit console app. I’ve added nuget package manually. Otherwise, it will install the package as a solution package.
<package id="NUnit.Runners" version="2.6.4" />
First step is to execute the acceptance tests with the nunit-console runner.
& $nunitRunner /nologo /labels /out=TestResult.txt /xml=TestResult.xml /framework:net-4.0 $acceptanceTests
It will generate two files: TestResult.txt and TestResult.xml. These files will be used when invoking SpecFlow report generation. TestResult name is the default name so if you don’t change it then in the next step you don’t have to provide additional parameters. You just need to provide the SpecFlow project file.
& $specFlow nunitexecutionreport "..\Source\Specifications\Specifications.csproj" /out:"..\TestResult.html"
This will generate TestResult.html report file in the root folder.
Another moment here I need to highlight – the specflow.exe is compiled for .NET 3.5 so it cannot load .NET 4.0 assemblies. You can find more details at Step Definition Report
For this reason we copy specflow.exe.config file to the packages folder.
Copy-Item -path "specflow.exe.config" -destination $specFlowFolder
Configure SpecFlow reporting in TeamCity
We can update our build so that after deployment it runs the SpecFlow Acceptance Tests and gives us the detailed report about the execution.
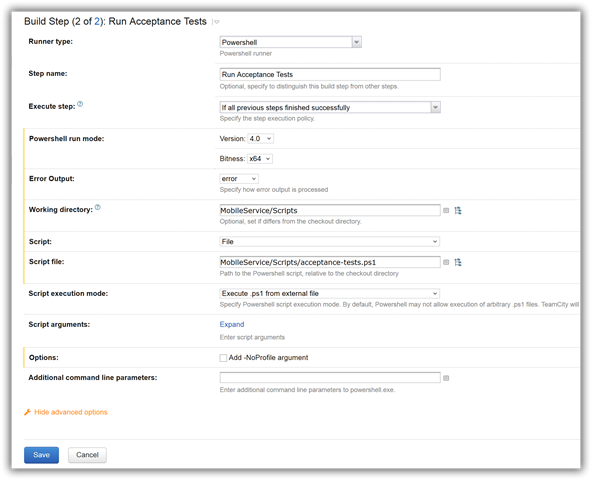
In the TeamCity configuration page open the Build Steps page. Add a new build step. As you might guess this will be another PowerShell configuration. The configuration is similar to the one we did before.
Working directory is MobileService/Scripts and Script file is MobileService/Scripts/acceptance-tests.ps1 with no parameters.
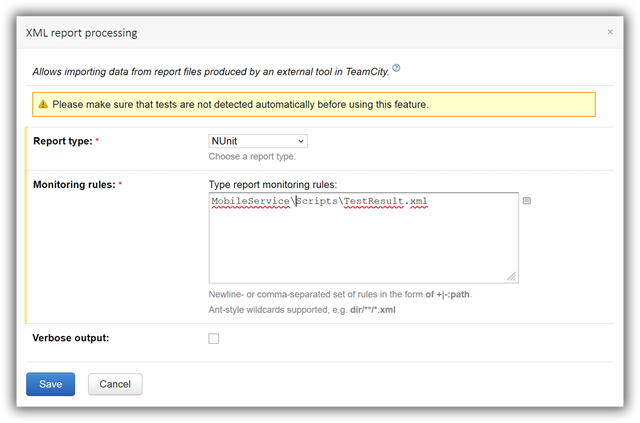
Next we need to configure TeamCity to display our SpecFlow report. First we add Build Feature – XML Report processing. The purpose of this is that TeamCity will take our TestsResult.xml file will parse it and report the results as the build results. In this way we can add out Acceptance Tests to be part of the CI process and they will be displayed in Test Results tab as well.
In the Build Configuration Settings page click on the Build Features and Add build feature. Select XML report processing from the drop down and select NUnit from the Report type. Add Scripts\TestResult.xml in the Monitoring rules.
Next step we’ll configure TeamCity result page to display the SpecFlow result page TestResult.html in a new tab.
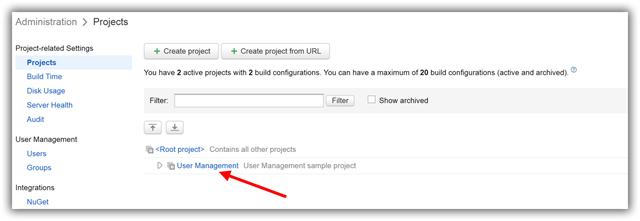
Open the Administration page and click on the User Management project.
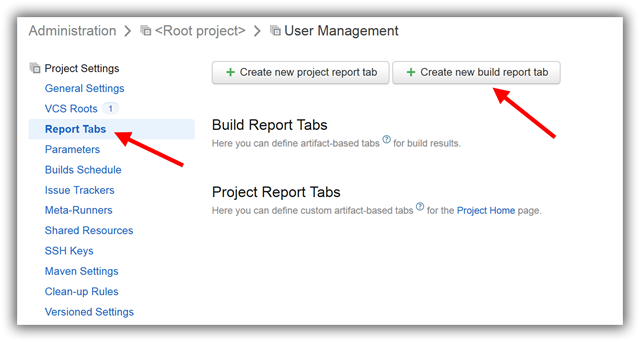
Click on the Report Tabs link.
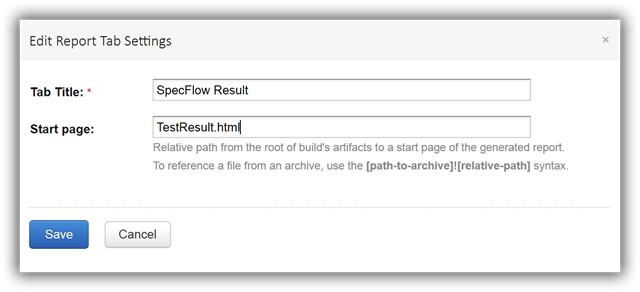
Click on the Create new build report tab. In the new dialog enter the Tab title – that will be the title of the tab which appears in the build result page and Start page which in our case will be TestResult.html.
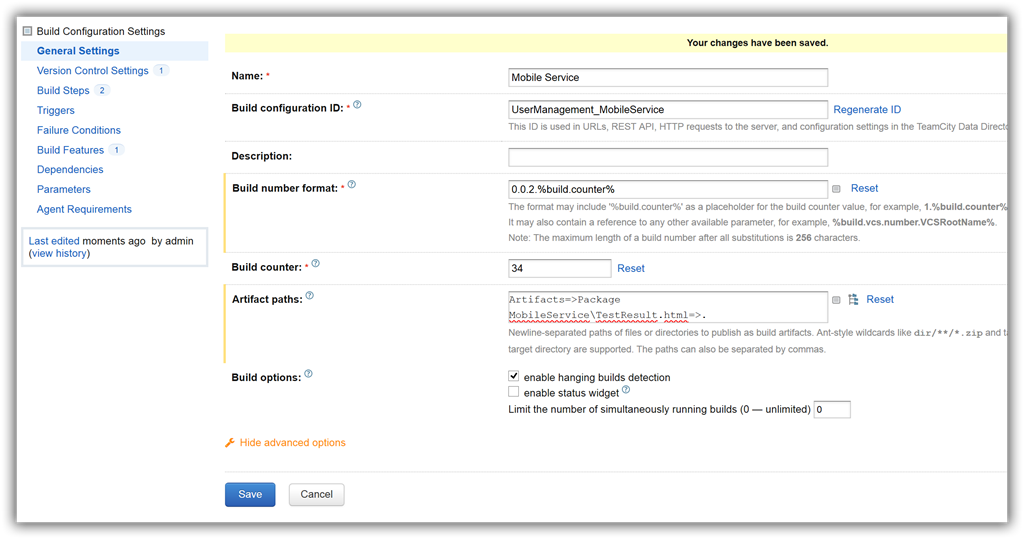
The Start page represents an artifact page which means that the TestResult.html page should be an artifact entity created by TeamCity. In order to do this go to the Build Configuration Settings and open the General Settings page. We have added already our package which gets deployed as an artifact. Now we need to add in the Artifact paths:
MobileService\TestResult.html=>.
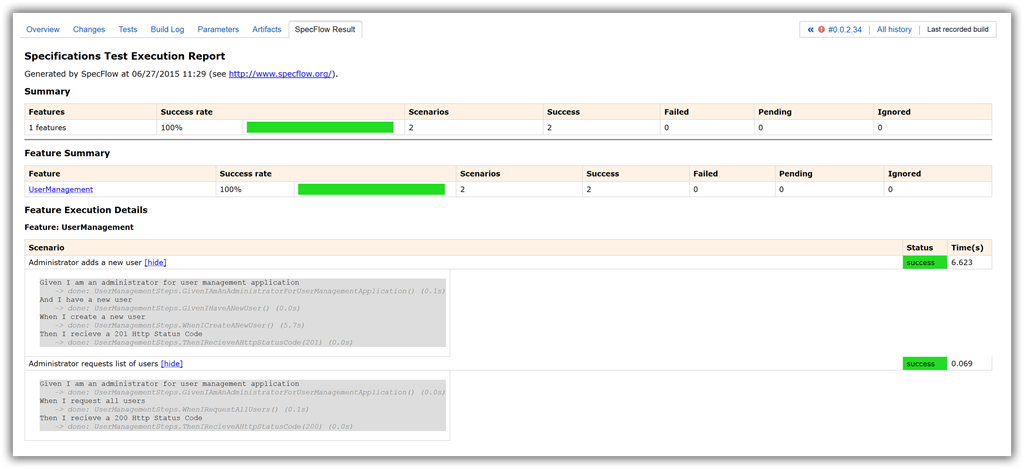
Now when we run the build we have a nice SpecFlow report.
This finishes the full continuous integration and deployment of an Azure Mobile Service in TeamCitiy.
But there one last step which is outside of this deployment pipeline – in the next post we’ll configure TeamCity to deploy a package to Test environment which was deployed and tested on Dev environment.
